
While looking through the smart thermostat market at a budget price, there are ample options available. Each of them offers plenty of features, saves money on bills, and is budget-friendly. Hence, it can be pretty hard for you to pick the right thermostat that works according to your needs and doesn’t break the bank.
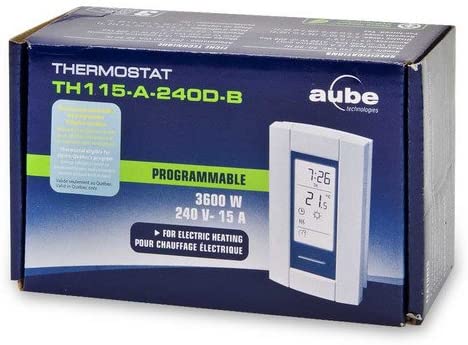
One such budget thermostat is Aube TH115-A-240D-B, a 7-day programmable device with advanced features and a compact design. Though not so stylish looking, it still offers decent functions and energy-saving features to save some money on your bills.
Manufactured by Resideo, a part of Honeywell Home, you can easily trust the build quality and longevity of the Aube TH115 thermostat.
If you are already thinking about buying Aube TH115, we would recommend you take a break and have a look at the detailed review of the Aube TH115-A-240D-B thermostat that’ll help you decide whether to buy it or not.
Let’s get started.
Aube TH115-A-240D-B Thermostat: What’s New
Aube TH115 is a stylish, compact, and programmable thermostat that is equipped with modern programming features and a large LCD display. With the help of this thermostat, you can easily control the temperature of your home to ensure total comfort and save money on energy bills.
Here are the key specs of the Aube TH115-A-240D-B thermostat.
- 4.9 x 2.8 x 0.9 inches
- 7-day programmable thermostat
- White color
- LCD screen
- Heating and cooling control functions
In the box, you get an Aube TH115 thermostat, two mounting screws, and four solderless connectors for copper wires.
Design and Display
The design of the Aube TH115 looks similar to mobile phones which once ruled the world during the 20th century. Unlike other thermostats, which are mounted horizontally, this thermostat takes a different route, i.e. vertical. It does provide an advantage as it doesn’t take up much space in your house. It measures 4.9 x 2.8 x 0.9 inches in size and sports a large backlit LCD display. And no, this doesn’t have a touchscreen display. Instead, Aube TH115 is controlled by buttons, that are hidden, to make it appear better.

On the display, you can view the current time, day, the current temperature of your house, temperature control mode, and a few other modes. Talking about buttons, there are hidden on the left and right-hand sides of the thermostat. Once opened, you’ll see the On/Off or On/Standby switch, Day button, Temperature adjustment buttons, Program button, Mode selection/program exit, Preset temperature buttons, and Backlight button.
While the design might not impress everyone, Aube TH115 at least did a fine job by allowing the owner to hide the control buttons to improve its appearance.
Thermostat Features
Aube TH115-A-240D-B is packed with decent features and competes well with other similar programmable thermostats. It has advanced temperature control that makes sure you are getting your total comfort by reducing temperature fluctuations. The Early Start function makes sure the programmed temperature is reached by the scheduled time.
Now let’s talk about different modes in Aube TH115.
This thermostat has three temperature control modes: A mode, F mode, and AF mode. A mode controls the ambient air temperature, F mode controls the floor temperature with the help of an external air temperature, and AF mode controls the ambient air temperature and keeps the floor temperature within preset parameters using an external temperature sensor.
When Early Start is switched on, the thermostat decides when to turn on the heat so that the comfortable temperature is reached at the start of periods 1 and 3. When Early Start is disabled, heating begins only at the beginning of periods 1 and 3, causing a delay in reaching the comfort temperature.
Aube TH115 also features a Daylight Saving Time function that comes in handy if you are trying to save money on your energy bills. The thermostat automatically switches to Daylight Saving Time on the second Sunday of March and back to the normal time on the first Sunday of November when the Daylight Saving Time function is enabled.
To set the Daylight Saving Time function and to set the date:
- Press the Day button for 3 seconds until DLS appears on the screen.
- Press either of the up or down arrow buttons to toggle between On (enabled) and Off (disabled).
- Press and hold the Day button for a few seconds. The current year will be displayed.
- In order to change the year, either press the up or down arrow buttons.
- Press the Day button briefly. The month setting is displayed.
- Press either of the buttons to set the current month.
- Press the Day button briefly. The date setting is displayed.
- Press either of the buttons to set the current date.
- Press the Mode/Ret button to return the thermostat to normal display
In addition, the thermostat has three preset temperatures: Comfort, Economy, and Vacation. When you are at home, the Comfort temperature is used, when you are asleep or away from home, and when you are away from home for an extended period of time, the Vacation temperature is used.
In order to use a preset temperature, press the appropriate preset temperature button for a few seconds. The current setpoint will be the preset temperature, and its icon will appear on the screen.
If you want to modify a current preset temperature, press either of the up or down arrow buttons to display the preferred temperature. Then hold the proper preset temperature button down until the icon appears.
Installation and Setup
The installation and setup of Aube TH115 are quite simple and you can easily do it on your own. However, professional help is highly appreciated if you aren’t comfortable doing it alone. We have covered the detailed steps required to install and set up Aube TH115 at your home. But before that, take note of some necessary precautions to avoid irreparable damage.
- Always turn off the electricity at the service panel before working with wire to avoid severe shock or electrocution.
- Use this thermostat for resistive loads only.
- Install the thermostat in a location where it will not be exposed to water or rain.
- Avoid places with air drafts (top of stairs, air outlets), dead air areas (behind a door), direct sunlight, or hidden chimney or stove pipes (except for floor heating systems).
- Choose a spot 1.5 m (5 ft.) above the floor for a new installation.
- Place the thermostat on an inner wall opposite the heating system (except for floor heating systems).
- Install the thermostat in a power box.
- While connecting the thermostat to aluminum wires, use special CO/ALR solderless connections.
- Keep the top and bottom air vents (openings) of the thermostat clean and unobstructed at all times.
Once you make sure you are clear with these important precautions, let’s find out the installation process of Aube TH115.
Installing the Thermostat
Step 1: First, turn off the heating system at the main electrical panel to ensure your device’s safety.
Step 2: Remove the thermostat faceplate from its wall plate by loosening the bottom screw. Also, note that the screw cannot be removed fully.
Step 3: Link the Aube TH115 thermostat to both the load and the power source.
Step 4: For the thermostat to be used in F or AF, make sure you have connected the floor sensor. Remember that you would have to install a separate ground protection device at the main electrical panel or use a thermostat with a built-in ground protection device for floor heating applications.
Step 5: In case you want to connect the floor sensor, connect the sensor wires to terminals 3 and 4 by inserting the floor sensor cable through one of the two holes on the wall plate (no polarity).
Step 6: Sensor wires must be routed outside the electrical box, down the wall, and to the floor, and must not come into contact with electrical wires.
Step 7: Make sure the sensor wire does not come into touch with the floor heating wires. For optimal temperature management, the sensor should be located between two-floor heating wires.
Step 8: The sensor head (the plastic end) should not be stapled to the floor. This may result in sensor damage. Any harm may go undetected during testing but may become obvious many days afterward.
Step 9: To connect a remote control device, pass the wires through one of the two wall plate holes and connect them to terminals 1 and 2. (no polarity).
Step 10: Using the included screws, attach the wall plate to the electrical box.
Step 11: Adjust the faceplate’s configuration switches.
Step 12: Tighten the screw and replace the faceplate on the wall plate.
Step 13: Connect the heating system to the main electrical panel.
The installation process of the Aube TH1115 thermostat is now completed.
The Good
- It is mounted vertically so it takes up less space.
- Large backlit LCD with hidden buttons.
- Advanced programming features
- Installation and setup are easy
The Bad
- The design isn’t impressive.
- Quite expensive.
Should you buy Aube TH115-A-240D-B Thermostat?
While Aube TH115-A240D-B is packed with pretty decent features and energy-saving features, it is still not enough to compete against the thermostats available at a similar price range. For instance, the Amazon Smart Thermostat, which costs almost the same as Aube TH115, offers plenty of smart features, smart home connectivity, and On-The-Go control.
One thing to note here is that both thermostats are made by Honeywell. While Aube is owned by Resideo, a part of Honeywell Home, the Amazon Smart Thermostat was made by Amazon in collaboration with Honeywell. But still, there is a huge difference in features even though the price is the same.
That said, if you need a thermostat that has advanced features as well as smart home connectivity, it’s better to go with the Amazon Smart Thermostat. Aube TH115, unfortunately, doesn’t live up to our expectations. There are much better options available in the thermostat market in a similar price range.
Comments are closed.