
Your Nest thermostat has worked excellent, but it has now given you the message that the battery is low. The questions you probably have are whether a battery is needed for your thermostat to work, can you troubleshoot the problem, and how do you charge the battery if it is completely depleted.
The reason why Nest thermostat is not charging could be due to loose wires either at the thermostat or HVAC. This can be solved by fixing the faulty wires, restarting the thermostat or manually charging it if needed.
Given in this article are the steps to troubleshooting a Nest thermostat when it is not charging.
Does my Nest thermostat need a charged battery?
There are three generations of Nest thermostats, and all three generations have built-in batteries. So whatever Nest thermostat you are using, it needs a charged battery. Nest thermostats don’t only run on battery power, but the battery is always needed to keep the thermostat working correctly.
The Nest needs the battery not only as a backup but also as support when the HVAC system is not supplying enough power to keep the thermostat executing all its functions. If there are no charging problems and the built-in battery is continuously being charged by the HVAC system, your Nest Thermostat will continue to work when the HVAC system is turned off even for a long period.
How are the batteries of my Nest thermostat normally charged?
The built-in battery of the Nest thermostat is continuously being charged via your HVAC system. It uses the Rh or Rc wire to charge directly from the HVAC system. A common wire (C-wire) completes the circuit.
How do I know the Nest battery is not charging?
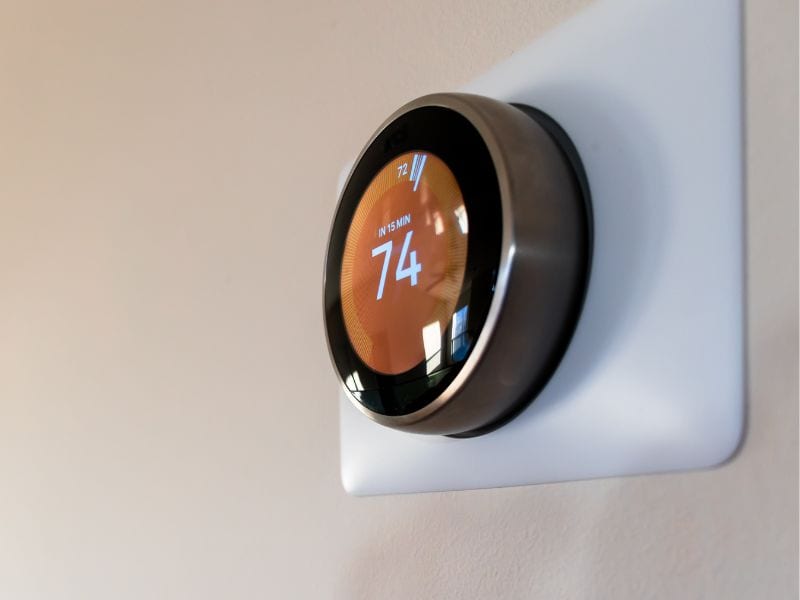
You’ll see a low battery warning on the Nest thermostat’s display when the battery is low. If the warning message is accompanied by red flashes, it usually indicates that although the battery is low, it is in the process of being charged. It could take up to two hours for the battery to be charged fully if it was fully depleted.
If there are no flashes, the battery is most probably not being charged, and if the low battery situation persists, it is also a sign that the battery is not charging.
Step 1: Restart Nest Thermostat
A restart of your Nest thermostat is the easiest first step to take, and it might solve your problem. Your thermostat, like most other electronic devices, might be fixed with a restart.
To restart your Nest thermostat, press and hold down the thermostat ring for 10 seconds or until the screen turns off. Release the ring and turn the thermostat back on by pressing and releasing the ring.
You’ll know that the battery is charging again if the red light starts to blink. Remember, it can take up to 2 hours for the battery to charge fully.
If the problem is not solved with the restarting of the thermostat, it is recommended that you manually charge the battery to keep your thermostat working. When the battery is charged, you can troubleshoot to determine why the battery doesn’t charge in a normal way.
Step 2: Manually charge the Nest battery
If the battery is not charging, you can manually charge the battery, but you must remember that it will probably only be a temporary fix. To charge your Nest thermostat’s battery manually, you need a USB cable.
Your Nest thermostat is equipped with a built-in USB charging port. The port is on the back of the thermostat. Thus, to charge it manually, you have to remove the Nest thermostat from its wall base.
To charge the battery, you need a wall charger such as an Android phone charger. Connect the cable from the charger to the thermostat’s mini USB port. (The Nest learning thermostat is equipped with a micro USB port.) After you’ve charged the battery for about 3 hours, unplug the UBS cable and replace the thermostat in the wall base.
You can now check the battery’s power via the menu settings on the thermostat. If the power is 3.8 volts, your problem will temporarily be fixed.
Remember that if you have to repeat this manual charging procedure, often your battery is most likely not receiving the right voltage.
Step 3: Troubleshoot further why the battery is not charging
If the battery is definitely not charging you’ll have to troubleshoot until you’ve found and fixed the problem.
Check whether your HVAC system is constantly receiving and providing power
A common cause of why thermostats develop power issues, including issues such as battery draining, is an unstable power source. The problem can be either that the HVAC system is not receiving stable power, or that the HVAC system is not providing stable power to the Nest thermostat.
Check the electrical connections between the AC outlet and the HVAC system’s devices. If you don’t detect any problem your next step would be to check the wiring between the HVAC’s control panel and the thermostat.
Loose wires can be the reason why your Nest thermostat is not charging. Before checking the wiring, first, turn off the circuit breaker so that no electricity is flowing to the Nest thermostat or the HVAC system.
Wires at the Nest thermostat side
To reach the wire connections to the Nest thermostat you have to remove the thermostat from its wall base. After you’ve removed the thermostat ensure that the white C wire and red Rh or Rc wires are securely attached. If any of them is not secure anymore, or even loose, attach and tighten them again.
Actually, it is good practice to disconnect each wire – even the ones which look secure – by pushing down the receptors and gently pulling out the wires. Clear and straighten the wires and connect them firmly again. When the wires are connected again, replace the thermostat back on its wall mount.
When replacing the thermostat, ensure that all the cables and wires are inside the wall. No wires should stick out.
Wires at the HVAC system’s control panel side
The HVAC system’s control panel is usually located inside your furnace. Ensure that the wires from your thermostat are all connected to the connectors. Look for the labels that are the same as that of your Nest thermostat.
If your HVAC system does not have a C wire it might be the reason why constant power is not provided to the thermostat. Adding a C-wire adapter or C-wire transformer may solve the problem. Adding an adapter or transformer require additional wiring to the HVAC system, but it is not difficult to install.
All you have to do is to take the two output wires of the adapter and connect one to the C-terminal of the Nest thermostat and the other one to the Rc terminal of the HVAC system. Then plug the transformer or adapter into your AC outlet.
The Nest thermostat will now be powered when you turn on your HVAC system and the battery should be charging.
Step 4: Factory reset the Nest thermostat
If you’ve checked all the wiring, restarted your thermostat and manually charged the battery but the problem still persists and the battery is not charging on its own, it may be that a thermostat software glitch caused the original problem. Software glitches can most of the time be fixed by performing a factory reset.
Just remember, when a factory reset has been done, all your settings will be removed. You’ll have to re-program your thermostat.
To perform a factory reset, go to “Settings” on your Nest thermostat and select “Factory reset.” You’ll be prompted to confirm the resetting and if you choose the option, it will be reset. Now you have to set up your thermostat and the app on your phone just like you did when you install the Nest thermostat in the beginning.
Last resort
If the factory reset also hasn’t fixed the problem you only have two options left.
Option 1: Regularly recharge the battery manually
If you don’t want to replace the thermostat now, you can monitor the volt level of the battery and regularly recharge the battery manually via the USB cable.
Option 2: Replace the thermostat with another Nest thermostat
Unfortunately, you’ll have to replace the current thermostat if nothing you’ve tried has worked.
But remember, if your Nest thermostat is malfunctioning you can have it replaced if it is still under warranty. And a Nest thermostat having battery problems is covered by the warranty policy.
Usually, the warranty period for a new Nest thermostat is one year.
Conclusion
Like other electronic devices, Nest thermostats can also encounter problems such as faulty built-in batteries. Fortunately, there are ways to troubleshoot the issues and to find solutions, even if it is sometimes only temporary solutions.
Comments are closed.