
Mysa Smart Thermostat For Electric In-Floor Heating is an advanced smart thermostat designed specifically for high-voltage in-floor heating, helping you save money while using your energy more efficiently.

Traditionally, most radiant floor heating systems used thermostats, which allowed homeowners to enter pre-set temperature programs. Similarly, it also allows homeowners to set pre-temperature programs and remotely control the radiant heating system using a smartphone or tablet computer.
For the time being, it is the only smart thermostat that deals with floor heating that has integration with Amazon’s Alexa. The apps and smart features should be almost identical to other Mysa thermostats. Most of the very popular thermostats, such as Nest or Ecobee Nest Ecobee, are not designed to work with high-voltage applications such as floor heating.
If you have been thinking of buying this thermostat, no doubt Mysa Smart Thermostat for Electric In-Floor Heating is one the best bet for you. However, before going for the purchase, check out its detailed review.
Let’s get started.
Mysa Smart Thermostat for Electric in-Floor Heating: What’s New
Mysa Smart Thermostat for Electric In-Floor Heating is a specially designed thermostat for electric underfloor heating which is compatible with the majority of existing brands. Its premium appearance enhances the style of your home which blends well with the wall. Mysa does not work with water-based or hydronic systems and is safe to use in your kitchen or bathroom without worry.
Here are the key specifications of the Mysa Smart Thermostat for Electric In-Floor Heating.
- 5.1 x 3.8 x 0.75 inches
- LED display with capacitive touch buttons
- White color
- 2.4GHz Wi-Fi connectivity
- Compatible with high-voltage electric floor heating systems and flooring types
In the box, you get one Mysa Smart Thermostat, two mounting screws, four-wire nuts, one in-floor temperature sensor, and wiring instructions.
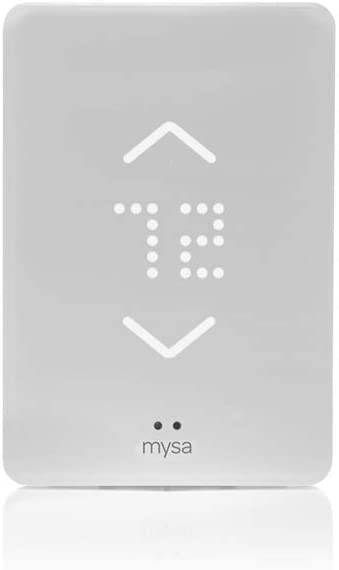
Design and Display
Mysa Smart Thermostat for Electric In-Floor Heating is a rectangular-shaped device with round edges. It measures 5.1 x 3.8 x 0.75 inches in size and sports four common display icons that will appear on the faceplate display when pairing or updating your Mysa. These include — The smile icon that opens on startup, the Arrow icon means the Mysa thermostat is ready to pair with Wi-Fi, and the Spinning Rectangle icon means Mysa is updating its software content from the internet, and the Check icon appears when settings are changed from the app.
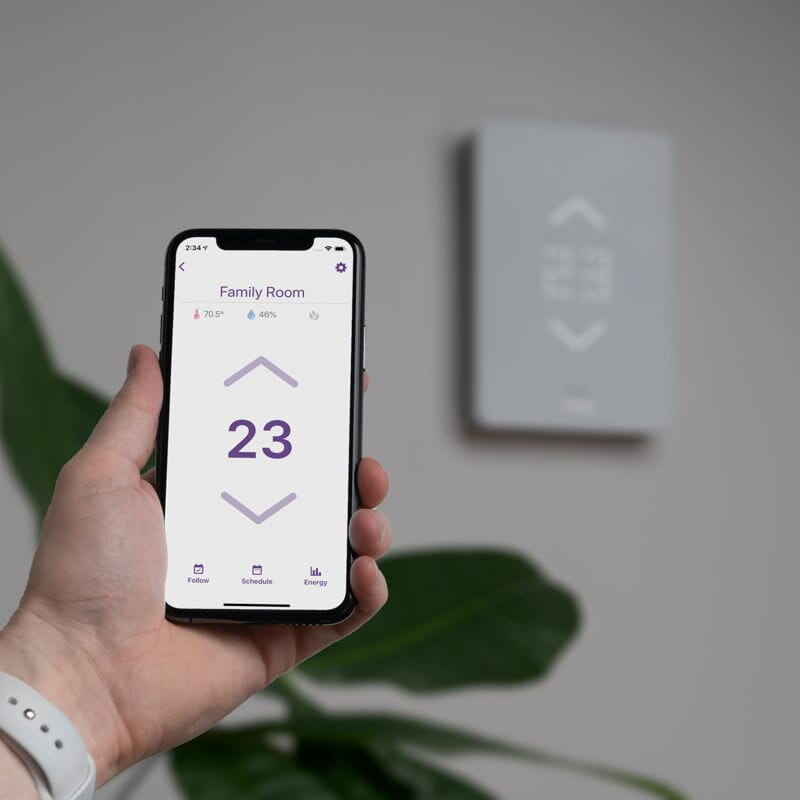
Mysa Smart Thermostat can be manually adjusted at any time by pressing the Up or Down arrow to increase or decrease the set point temperature. It will display the current room temperature by default. The setpoint will appear when you manually adjust the temperature, allowing you to set your ideal climate for the room.
Overall, the looks and features of the Mysa thermostat are cool and attractive.
Thermostat Features
Mysa Smart Thermostat is loaded with lots of cool features and energy-saving tips. With Adaptive Brightness Technology, you can set your preferred display brightness using the Sleep and Wake On Approach, and Mysa’s display will automatically adjust to ambient light in your home.
One of the many advantages of baseboard heating is the ability to control your heating in zones. This means you can control your heat from a single central thermostat rather than room by room.
Zones are defined by Mysa as groups of thermostats, typically two or more thermostats. Thermostats in the same zone operate on the same schedule and have the same set-point temperature, heating up your room at the same time.
Since smart thermostats with floor heating are considered to be small-cranny affairs, it takes a lot longer to create the programs that you want your smart home to have. If you are using a floor heating appliance as your primary source of heat, you probably need to be working with a probe that detects the temperature of the air.
This is how you can create a Zone:
- Open the Mysa app and select Menu.
- Select Zones.
- Press the Start button.
- On the ‘Name Your Zone’ screen, enter a name for your zone in the text input field.
- Tap the rooms (thermostats) you want to add to this zone, then click ‘Done.’
- Following that, you can either create a schedule using our schedule wizard or set it up later.
- You will see an alert indicating that you have successfully created a zone. To create another zone or return to the home menu, select one of the options.
The geofencing feature is also supported by the Mysa thermostat. This feature uses your location to determine whether or not anyone is at home, preventing you from paying to heat an empty house.
When it comes to your energy bill, you can see how much energy you used, a percentage-based comparison to the previous month’s use and the impact each of your Mysas had on your total energy consumption through Mysa Monthly Report.
To calculate your total energy cost for the month, enter your energy cost per kilowatt-hour (found on your energy bill) into your Mysa app.
Mysa Smart Thermostat for Electric-In Floor Heating is also compatible with smart home integrations. You can control this thermostat via your voice commands as it supports Google Home, Apple HomeKit, and Amazon Alexa.
Installation and Setup
Mysa Smart Thermostat can be easily installed in less than 20 minutes as step-by-step videos and guides are available online. Handling high voltage wiring, however, is required when installing this product. Each step of the enclosed instructions must be carefully followed. Before proceeding, turn off your circuit breakers and take the necessary safety precautions to avoid personal injury or death.
The thermostat must be installed in accordance with the applicable local and/or National Electrical Codes and Utility Requirements. Where required by law, this installation should be entrusted to duly qualified personnel. Also, make sure you are using copper wire with this thermostat and not aluminum wire.
Follow the below step-by-step guide to complete the installation process.
Step 1: Before beginning any electrical installation, turn off the power, locate your electrical panel, and locate the breaker that protects your in-floor heating circuit. Set the breaker to the “OFF” position.
Step 2: To ensure the heater is turned off, do the following:
- Turn the thermostat all the way up.
- Wait for 5-10 minutes.
- Place your hand on the floor to ensure that no heat is coming through.
Step 3: Remove your old thermostat. Stop working and call an electrician to finish the installation if you are unable to confidently identify the heating circuit’s corresponding breaker/fuse or if you are unsure if the power to your heater is off.
Step 4: Loosen, but do not remove the screw at the bottom of the front plate!
Step 5: To gain access to the mounting screw holes on your Mysa, remove the front plate.
Step 6: Before wiring, identify the cables/wires and the panel and heater connections. Use the supplied wire nuts to connect your Mysa in case of a 120V system:
- Mysa L to Supply Wire (L): Connect Mysa’s black L wire to the electrical panel’s supply wire – L (usually black).
- Mysa N to Neutral Wire (N): Connect Mysa’s white N wire to the electrical panel’s neutral wire – N (usually white).
- Mysa LOAD 1 to LOAD Wire: Connect Mysa’s black LOAD 1 wire to the heater’s LOAD wire (usually black).
- Mysa LOAD 2 to LOAD Wire: Connect Mysa’s white LOAD 2 wire to the heater’s LOAD wire (usually white).
Use the supplied wire nuts to connect your Mysa in case of a 240V system:
- Mysa L1 to Supply Wire (L1): Connect Mysa’s black L1 wire to the electrical panel’s supply wire – L1 (usually black).
- Mysa L2 to Second Phase Leg (L2): Connect Mysa’s white L2 wire to the electrical panel’s second phase leg – L2 (usually red).
- Mysa LOAD 1 to LOAD Wire: Connect Mysa’s black LOAD 1 wire to the heater’s LOAD wire (usually black).
- Mysa LOAD 2 to LOAD Wire: Connect Mysa’s white LOAD 2 wire to the heater’s LOAD wire (usually red).
The supply and load wires are not interchangeable. If Mysa’s display does not turn on after you finish installing it, you may have wired the supply connections to the load connections or vice versa. Recheck the wiring and, if necessary, swap the supply and load wires.
Step 7: Attach the Temperature Sensor to the Floor. Pull the temperature sensor wires through the Mysa’s back hole. Then, using the provided screws, secure the Mysa to the gang box with a Phillips screwdriver. Insert the sensor wire ends into the two terminals and tighten the two screws with a small flat head screwdriver. It makes no difference which wire connects to which terminal as long as both are securely fastened.
Step 8: Connect your Mysa to the front plate. It should slide right into place.
Step 9: Tighten the screw to secure the front plate to the Mysa. Make certain not to over tighten the screw.
Step 10: Turn on the power to the Mysa via the circuit breaker.
Step 11: Check to see if the thermostat turns on, lights up, and displays a triangle.
Once confirmed, your Mysa thermostat is ready to be used.
You can control all the smart features of the Mysa smart thermostat through its app. Download the Mysa app from the Google Play Store or the App Store and create an account. Follow the instructions to connect your Mysa to your phone and begin using the full suite of smart features such as scheduling, geofencing, energy charting, and more!
Also if you want to check the compatibility of the Mysa Smart Thermostat with your heating system, you can do that here.
The Good
- Stunning design
- 2.4GHz Wi-Fi connectivity
- LED display
- Takes less than 20 minutes to install
- Compatible with Google Home, Amazon Alexa, and Apple HomeKit
The Cons
- Quite expensive
- Wiring can be puzzling when compared to the thermostat you’re replacing.
Should you buy Mysa Smart Thermostat for Electric In-Floor Heating?
The electric radiant heater maker, WarmlyYours, says that Mysa WiFi differs from other WiFi-enabled thermostats for electric floor heaters by several key factors, which contribute to maximizing the energy efficiency of your radiant heating system.
The Mysa Smart Thermostat is a popular choice among the electric floor heating systems and serves its purpose well. Some notable features like geofencing, adaptive brightness technology, vacation mode, and energy reports make it an ideal choice.
If you have been thinking of buying this thermostat, then you can definitely go for this one. Though it’s a little expensive, it is truly worth every penny.
Comments are closed.