
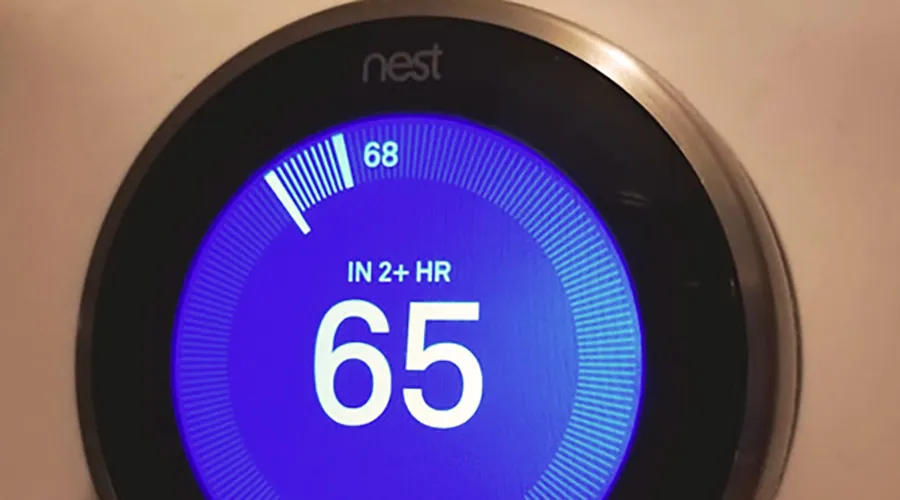
Nest thermostats are effective learning thermostats controlling the temperature in your home. You are even able to control your temperature settings remotely utilizing connectivity through a mobile device and app. However, sometimes you might get some disturbing messages on your thermostat when it displays an “In 2 Hours” message and might be accompanied by adverse temperatures in your home. What is the reason for this?
The Nest thermostat says ‘In two hours’ to indicate that the temperature change will take two hours. This can be due to the thermostat still being in its learning phase, there was a system reboot, a software update, or the c-wire is not connected properly.
Let see in details what these reasons are;
Four Major Reasons for “In 2 Hours” Display On Nest Thermostat
Whenever you change the settings on your thermostat and get the “In 2 Hours” message, the temperature change will take two hours, or the thermostat is delayed for 2 hours. In any case, you must remember that in the beginning, the thermostat is learning, and take a guess how long the temperature change might take while, on the other hand, there might be a problem.
The reasons for the “In 2 Hours” display can be divided into four primary causes, and we will discuss them in priority order. We have also included the fix for each cause.
1. The Nest Thermostat is Still Learning – Recently Installed
You would be furious if someone told or showed you something complicated once and expected you to remember it immediately. Your brains need repetition to remember tough stuff before you will be able to remember or do it. The same is true for your Nest thermostat that is electronics created by humankind. Repetition will allow the electronics to remember how long it takes to go from one setting to another, especially if the Nest thermostat is new.
The new or “baby” Nest thermostat must first learn its own capabilities as well as the area in which it operates to change, and therefore, it gives you an estimate of two hours to reach the new setting. Later on, it will have all the information to provide you with a better estimate.
The Fix for Nest in 2 hour error(If it is a recently installed one)
If your Nest thermostat has recently been installed, then the solution is simple. Just be patient, ignore the display, and give your Nest thermostat time to learn. In time it will learn to provide you with a more accurate time in which the new settings will take place
2. You Did A System Reboot And The Nest Thermostat Must Learn Again
Whenever you do a system reboot, the Nest thermostat has to go through the learning procedure again, and you might end up with the two-hour delay message again. To fix it, the only thing needed is patience. Give the Nest thermostat some time to learn again, and after that, you will be all set.
3. Software Update
A software update of the firmware on your Nest thermostat can give you an “In 2 Hours” message as well but rest assured. After the update, the only thing you have to do is, wait for the nest thermostat’s learning curve out. After a while, the Nest thermostat will be fully operational again.
4. The C wire is not connected
When everything is running smoothly, and your Nest thermostat is trained in handling the temperature in your home, and all of a sudden, you get the 2-hour delay message accompanied by no control of temperature in the house, then it might be a C wire problem!
The C wire or common wire is connected between your Nest thermostat and your HVAC control panel situated in the furnace. The C wire ensures that a permanent 24-volt power supply reaches your Nest thermostat, whether the HVAC system is on or off. The C wire runs from the HVAC control panel C terminal to the C terminal of the Nest thermostat.
The Fix for Nest showing 2 hour error
(If c-wire is not connected)
If the C wire is not connected, your Nest thermostat can become underpowered, which leads to poor internet connectivity, and you and the thermostat can’t control the temperature in your home. If you notice any or a combination of these factors, the chances are good that you have an unconnected C wire.
Unlike traditional thermostats, the Nest thermostat is not battery-operated during normal operation, and you can quickly check if a C wire is installed or not by checking your settings as follow:
1. On your nest, scroll to “Settings.”
2.Click on “Equipment.”
3. You will see a tab displaying the following if your Nest thermostat is wired correctly:
G for the fan.
W1 for the heat.
RH for power.
C for common wire.
If there is no C in the tab, then that will mean your C wire is not connected.
Connecting a C wire between the nest thermostat and the HVAC control panel can be done in three ways and will depend on what is available and feasible. We will start with the easiest way to add the C wire and ends with the most challenging way.
a. Fitting a C wire adapter.
The easiest way is to buy and install a C wire adapter. You will only need a power outlet close to your Nest thermostat where you can plug it in. Connect the adapter to your Nest thermostat and plug it in after putting off the electrical supply to your HVAC system:
- Remove the RH wire on your Nest thermostat and plugin one wire from the adapter instead of the old RH wire.
- Plug the other wire of the adapter into the C terminal. It does not matter which wire of the adapter you connect where; they are interchangeable.
That will solve your problem but hiding the wires might be a challenge.
b. Connect The Blanked Off C wire (Blue wire)
The blue C wire might be curled up around the cable at both ends, connecting the HVAC control panel with the Nest thermostat if you are fortunate. You can then untangle the blue C wire and connect it to the HVAC control panel and the Nest thermostat.
Your C wire is connected, and you will have a perfectly operating Nest thermostat without any problems.
c. Install a new C wire
If no C wire is available, you might install a new C wire between the HVAC control panel and the Nest thermostat. That might be a difficult and expensive task seeing that you might have to get Technicians to the job, but it is another option.
d. Using the G wire
If you don’t have access to a C wire and you don’t want to install an adapter, you can utilize the G wire instead of the arduous task of pulling in a C wire. The G wire is green and supplies you with manual control over the blower fan. A lot of people confuse this wire with the ground wire, but it is not the same.
Move the green wire to the C wire terminal, and you will have a C wire installed as discussed in this video to simplify the whole process for you.
Conclusion
By following the most appropriate method of solving your problem with the faulty “In 2 Hours” display, you will ensure comfort in your home with settings on the Nest thermostat that will be executed correctly.
Comments are closed.